
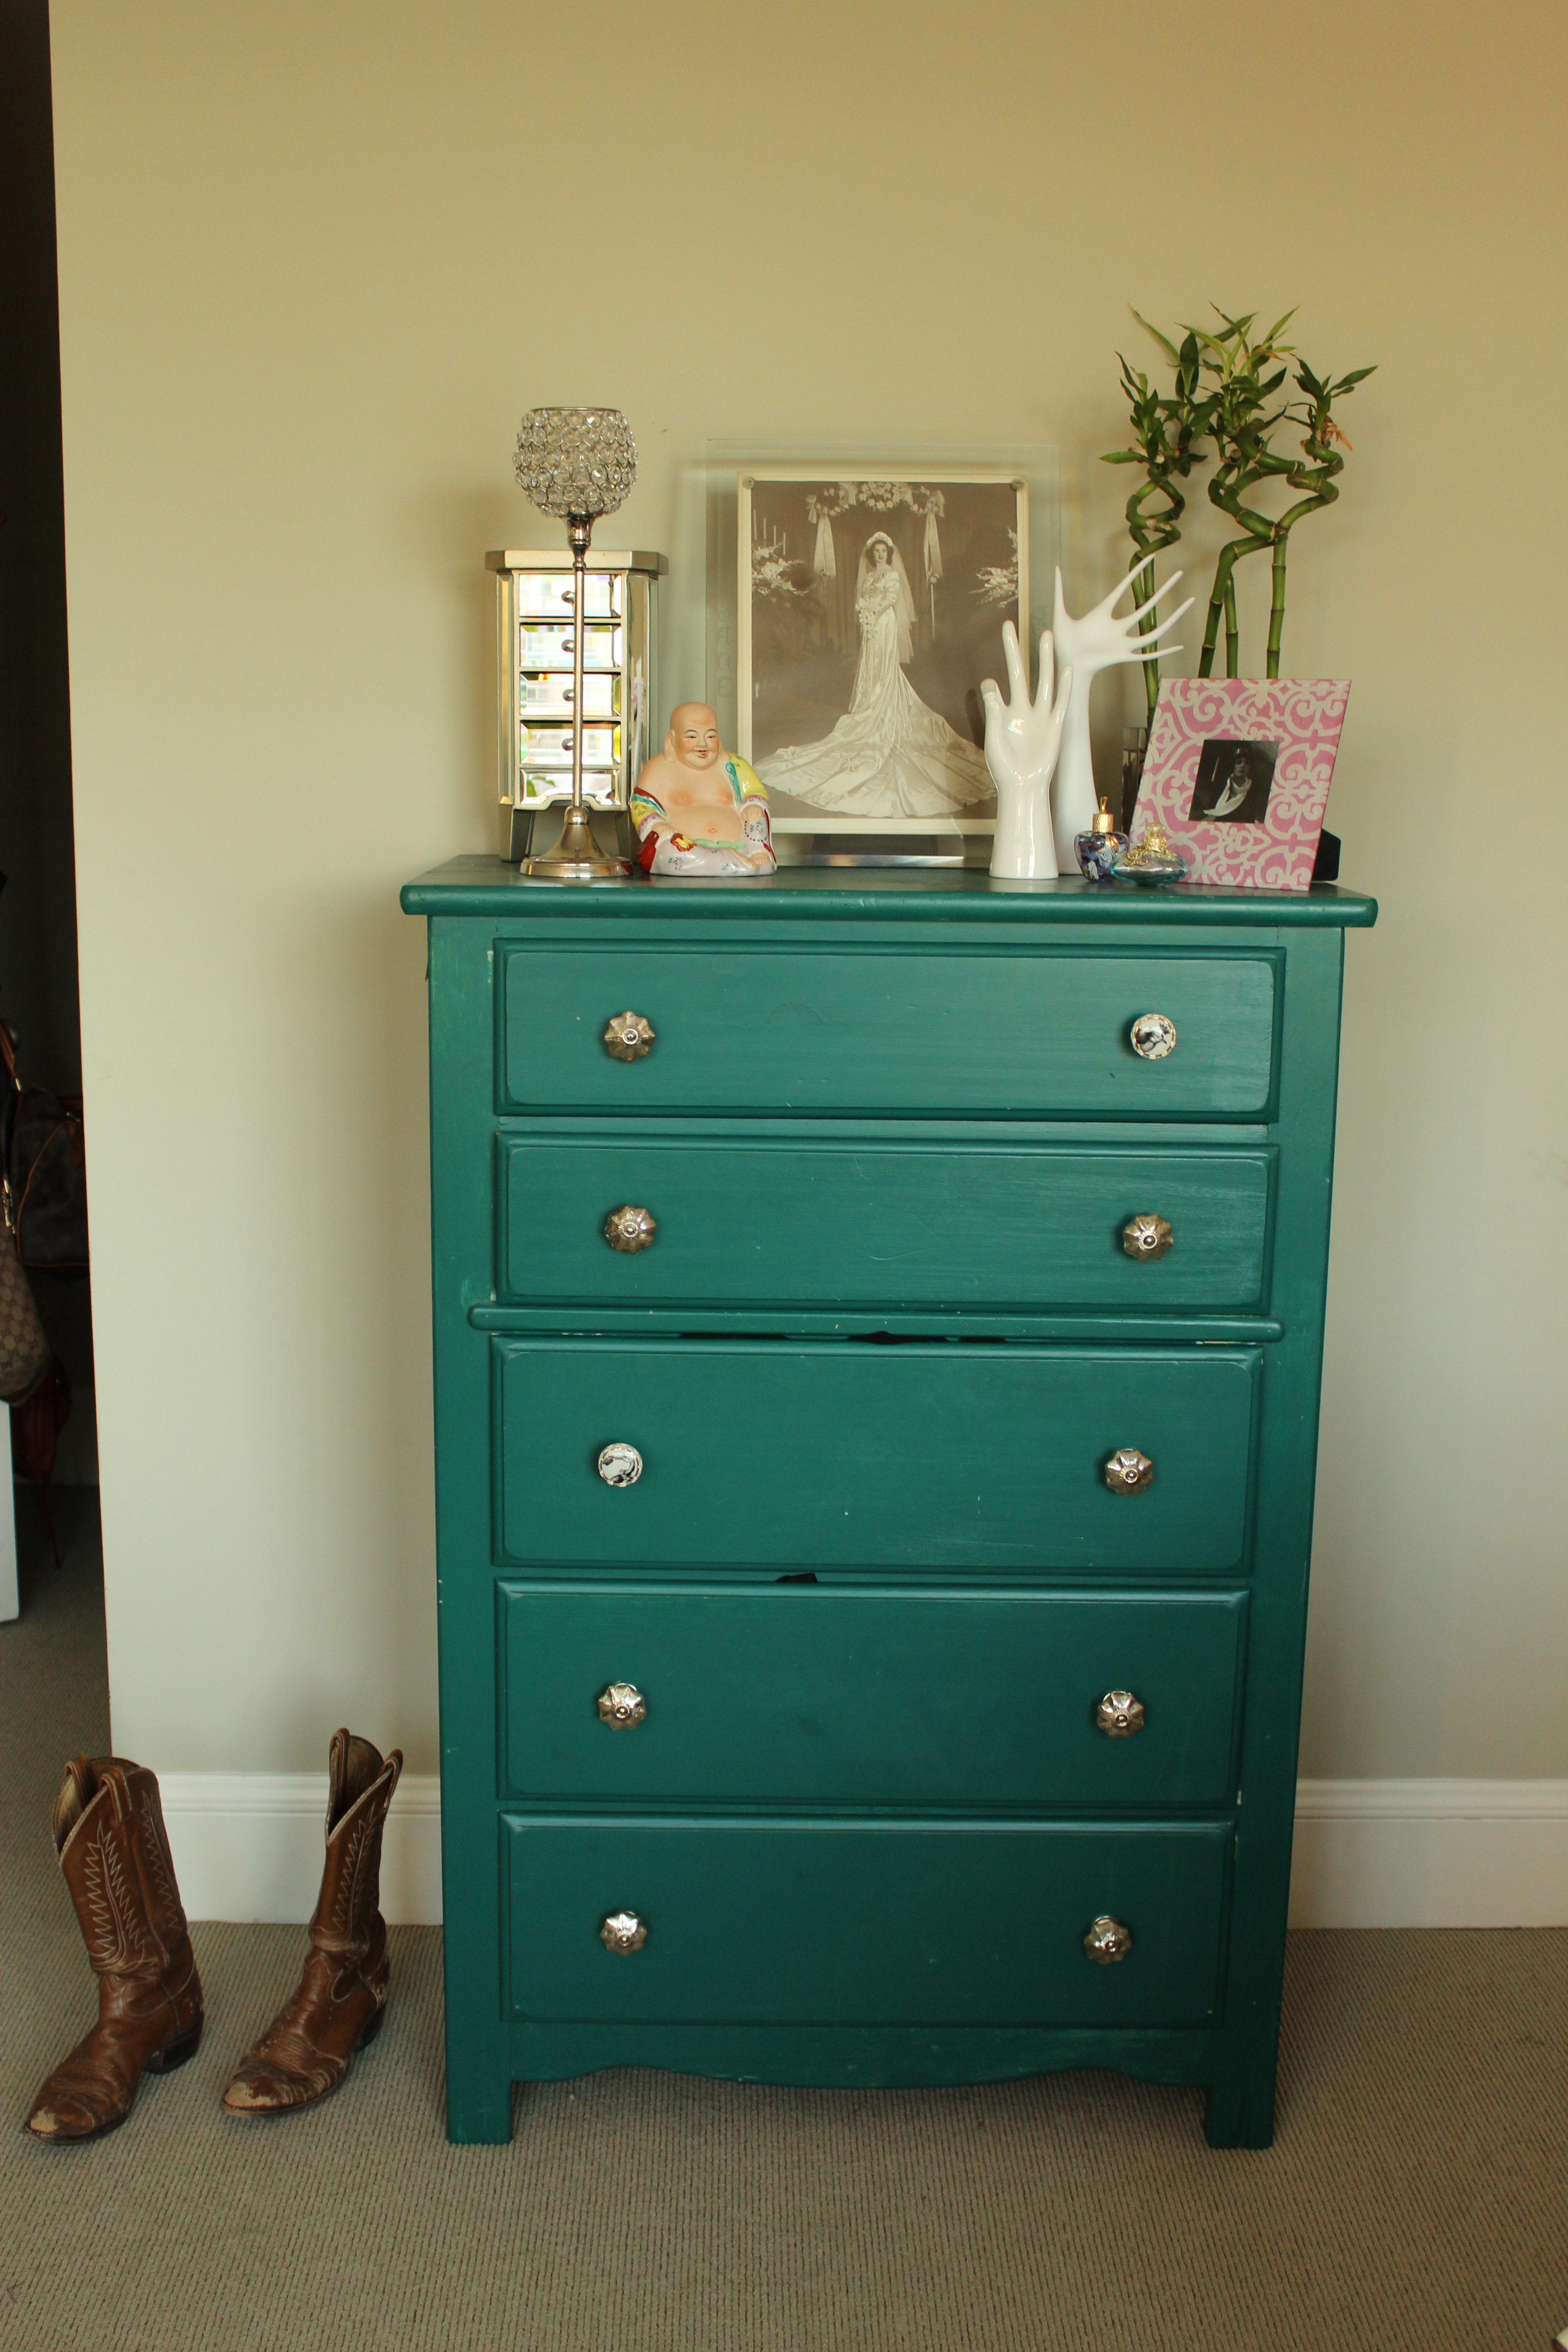
Redressed Dressers: DIY
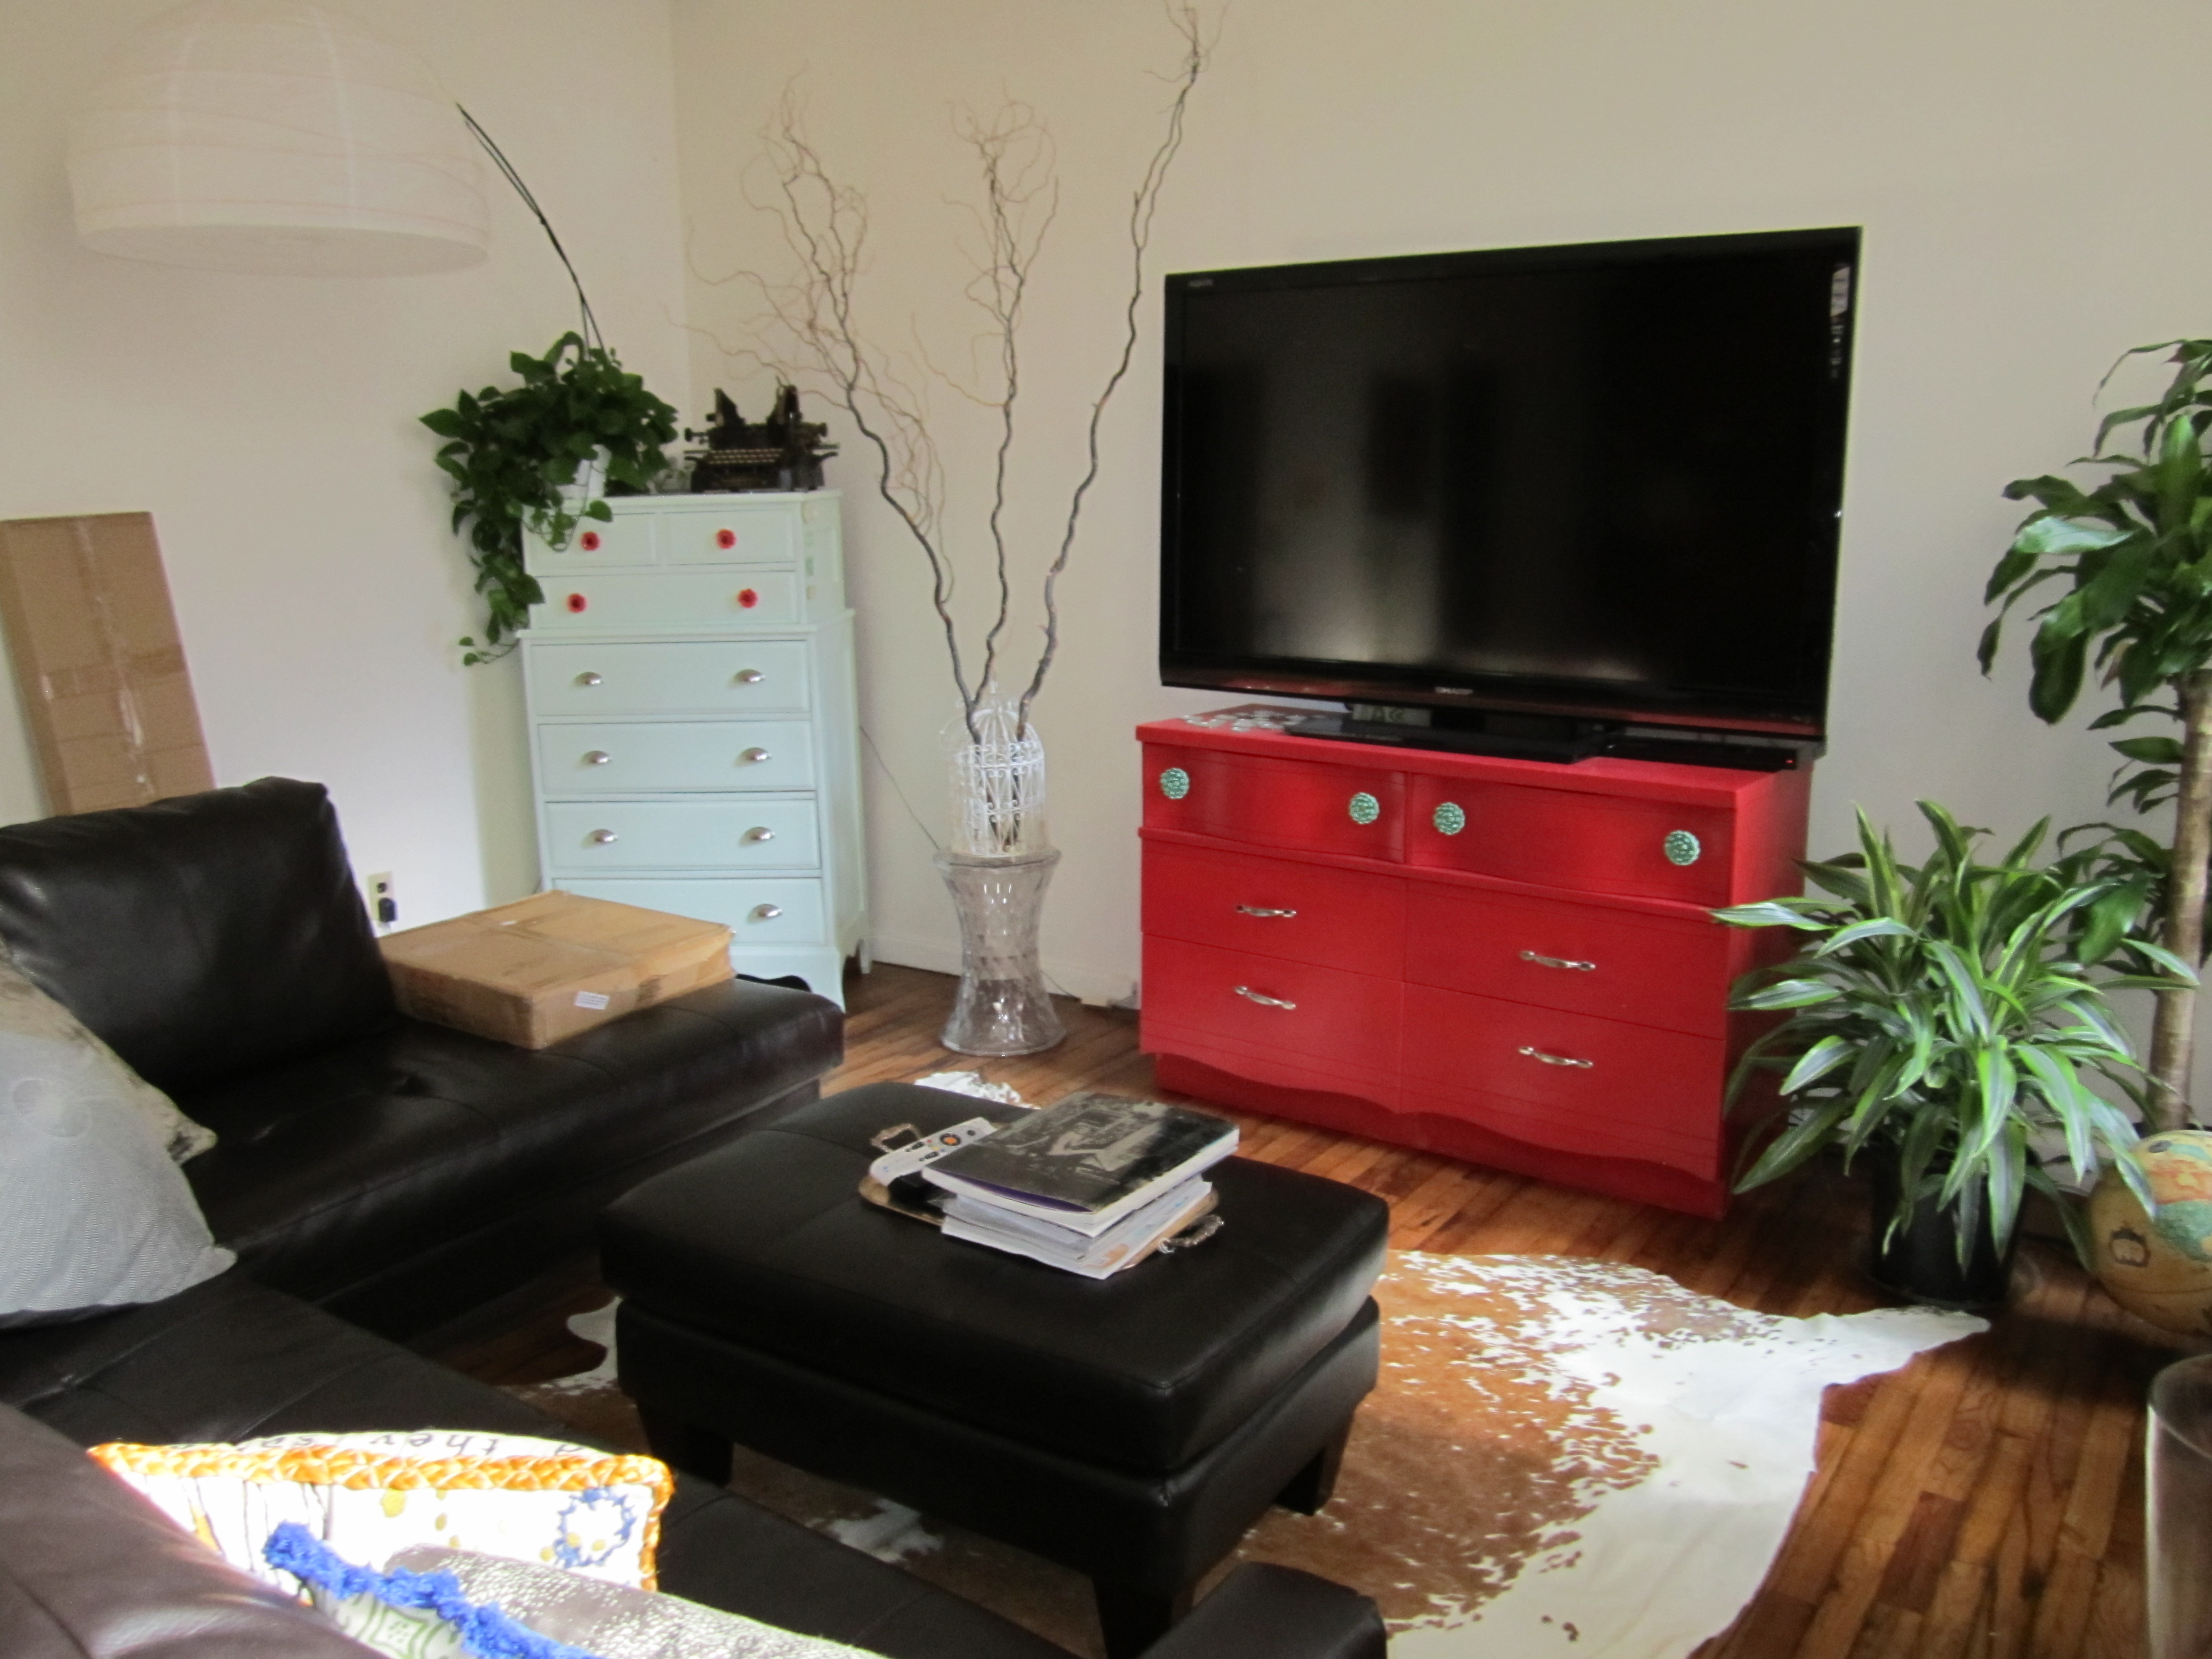
Both of the dressers in my room and the one in Courtney’s room came from the free section on Craigslist and were refurbished. I paid $40 to get one of them delivered – well worth it after trying to get the first one home in a taxi. Refurbishing an old dresser is actually quite easy and something you can do at home. Just follow these steps:
Step1: Find a dresser you love. Don’t worry about the finish because you’re about to paint over that. Think more about the shape and the material. Does it have a unique shape? Do the drawers function? Is it clean? Is the wood nice? I found that IKEA dressers are not the best to be re-painted because of the slick finish on the artificial wood.
Step 2: Choose your paint. I used Benjamin Moore, but there are plenty of good paint brands. I’d suggest a trip to Home Depot so you can pick your favorite color from the swatches. They’ll ask you what finish you want and mix your paint on the spot. The finish is mixed in the paint and can be different variations of glossy or matted. I personally prefer a matted finish. You can find color inspiration on the Behr or Benjamin Moore sites.
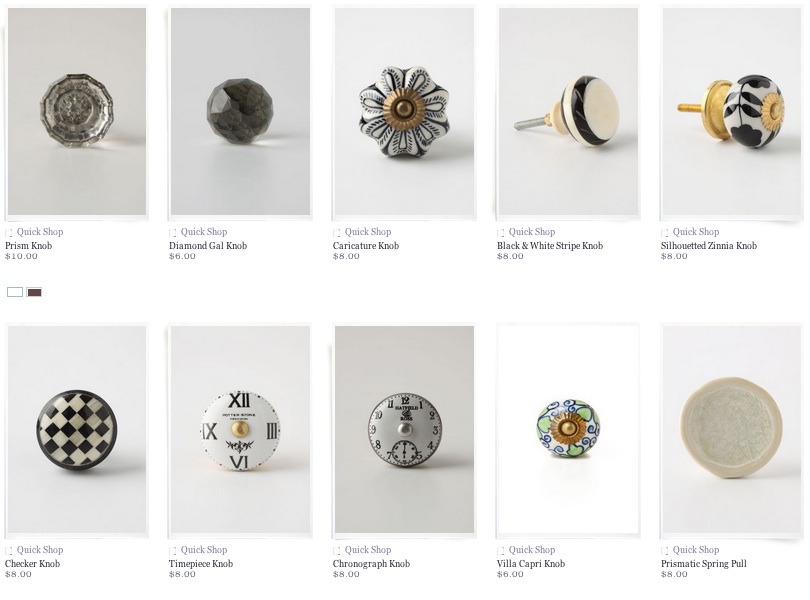
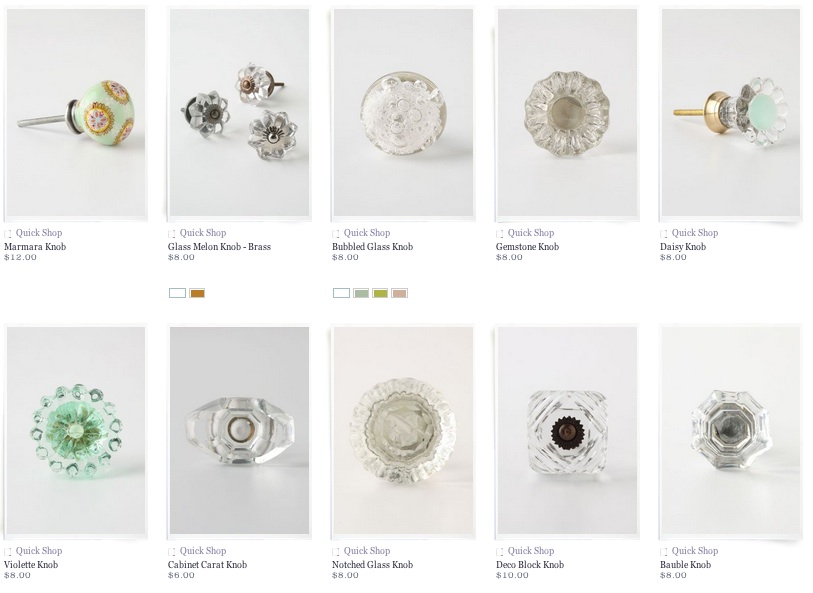
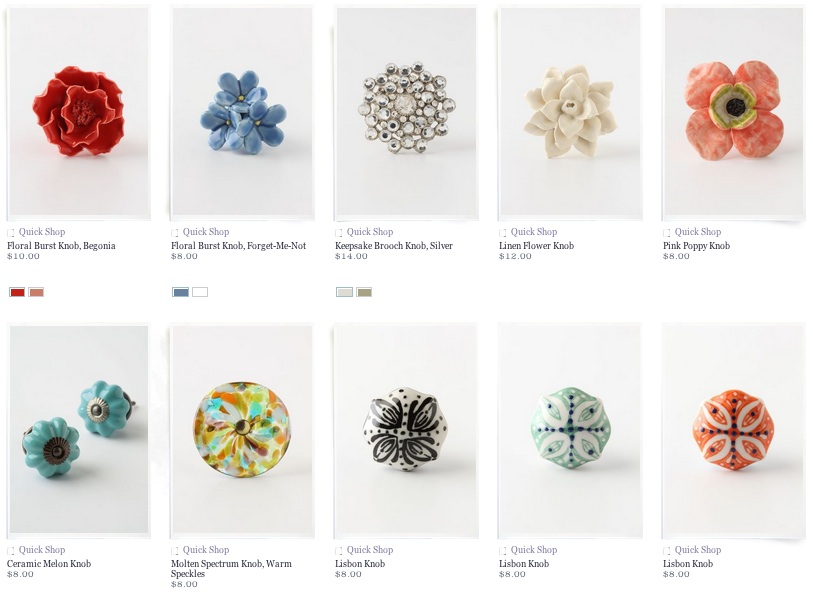
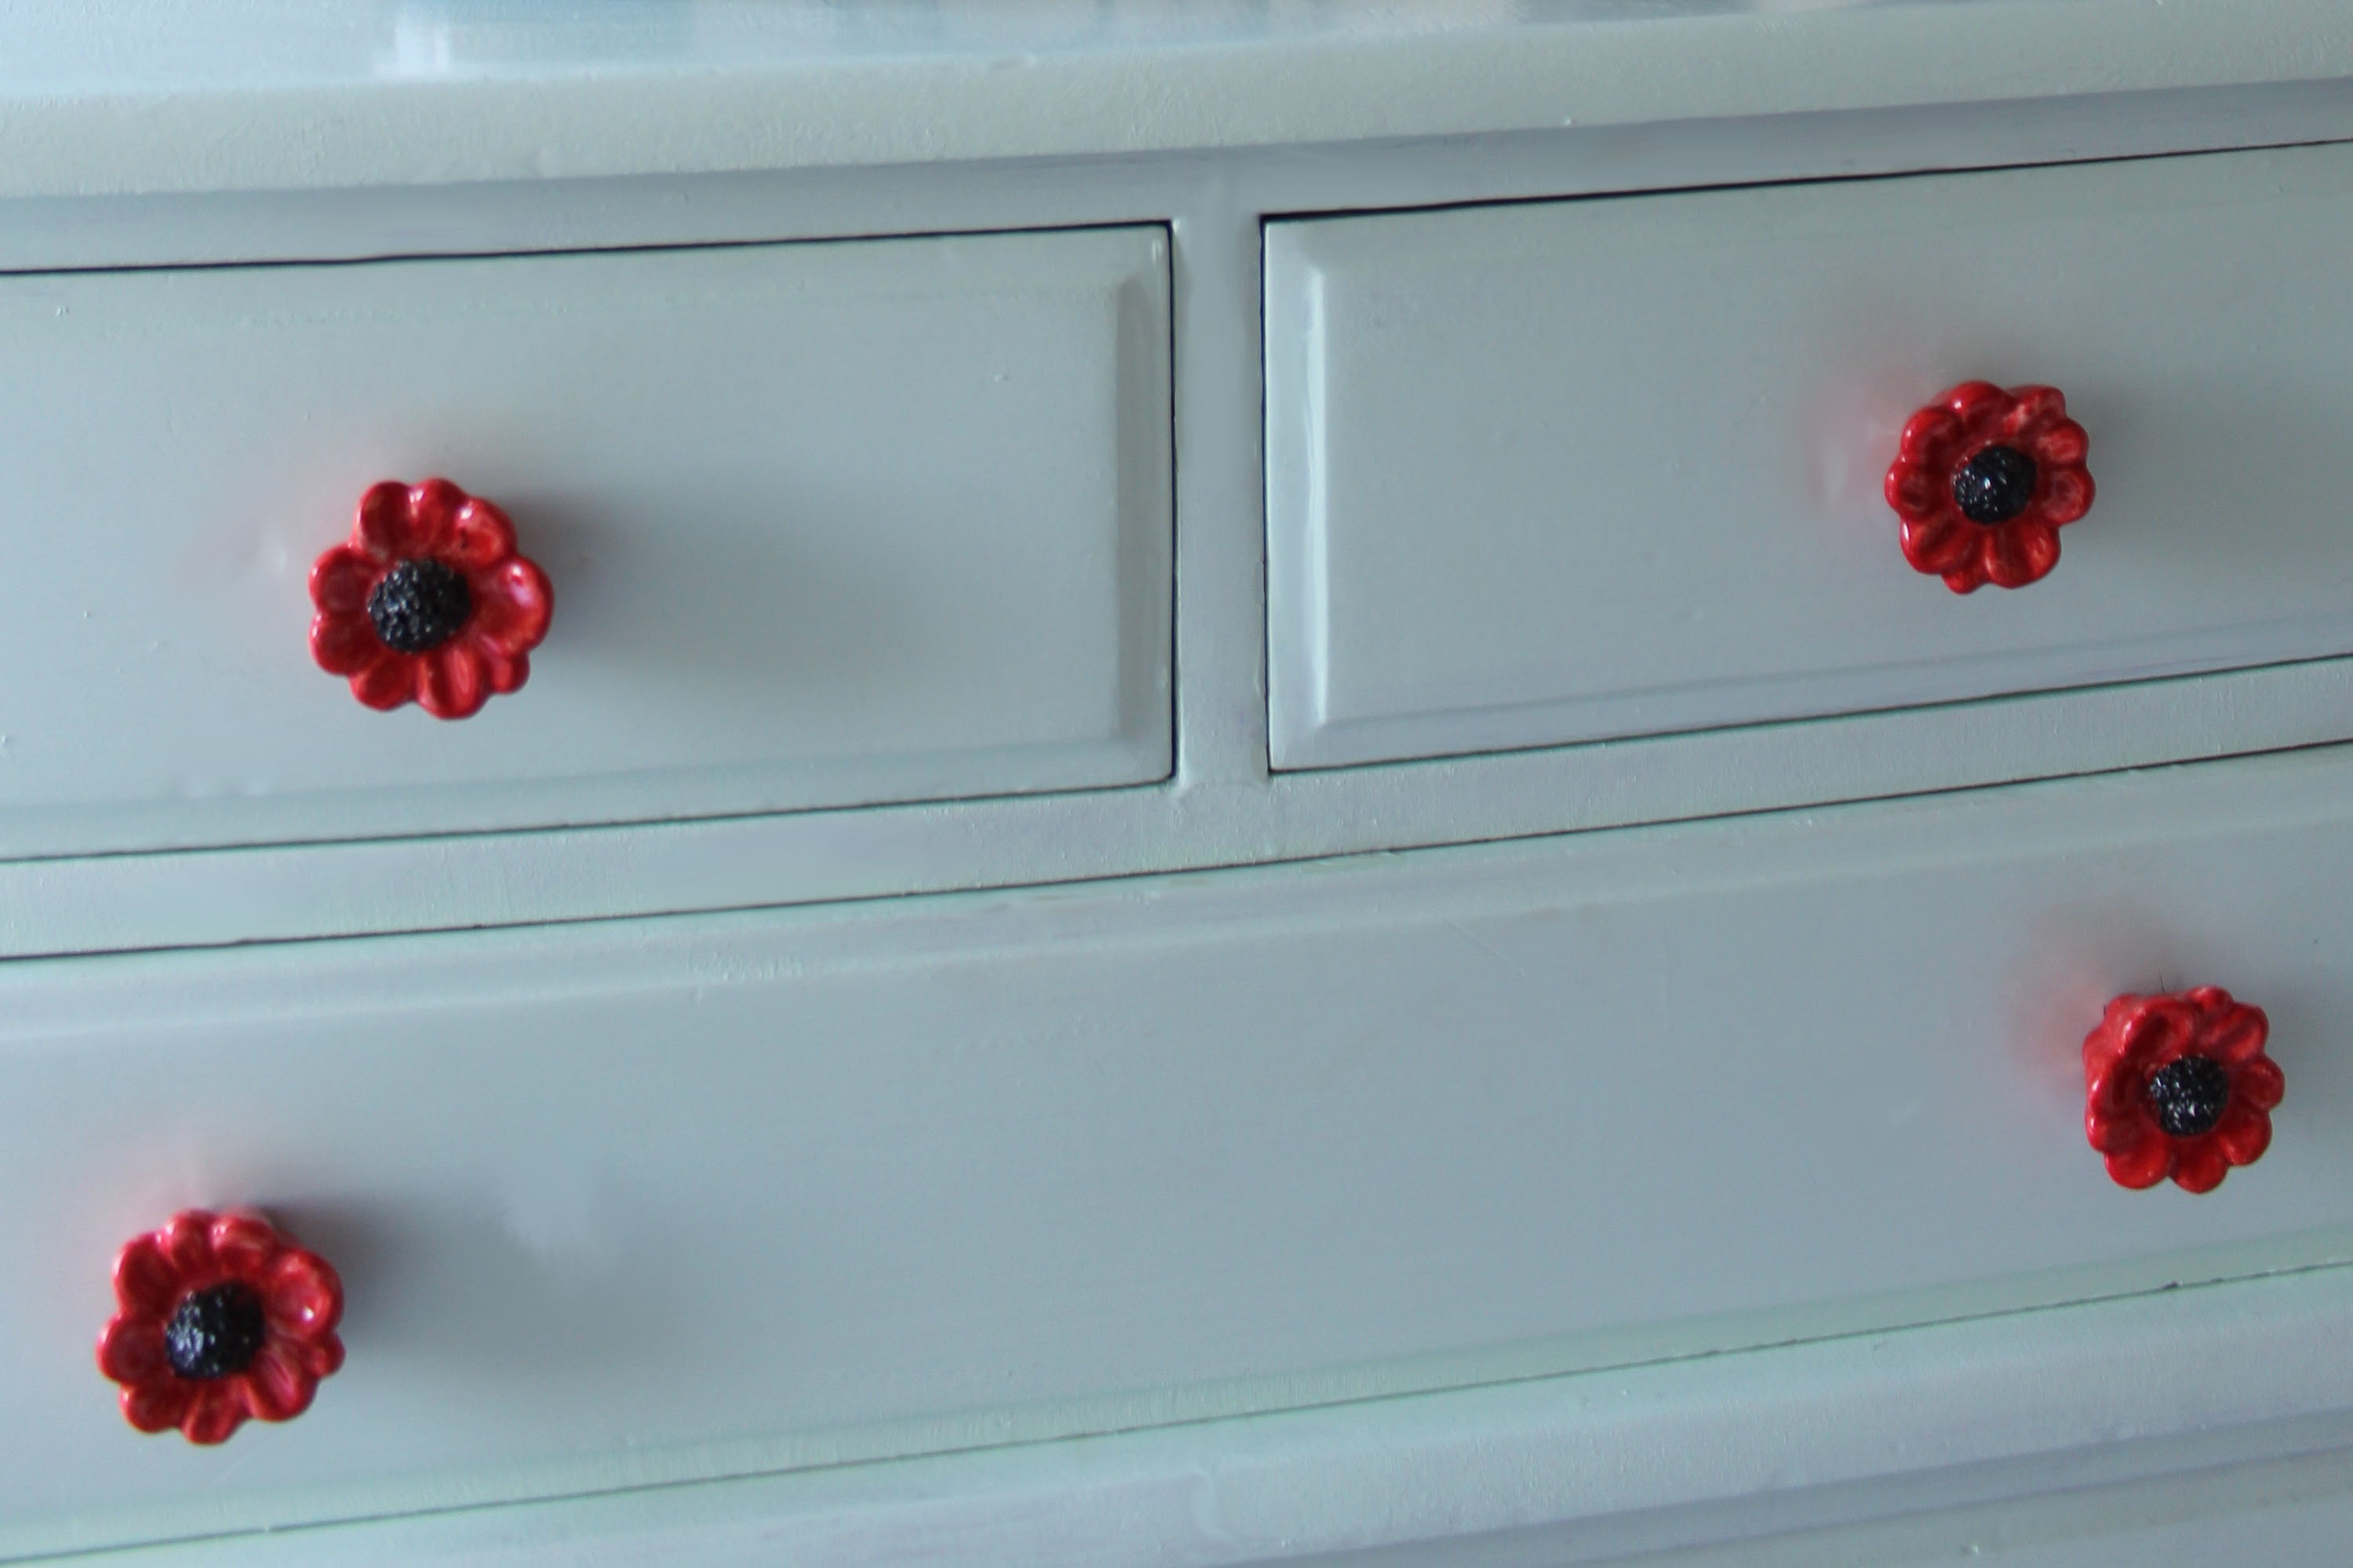
Step 3: Choose your knobs. Hands down, Anthropologie is the best place to buy knobs. Don’t be afraid to mix the patterns and choose knobs that compliment each other. Also check the sale section because they’re usually trying to get rid of some. If there are a lot of knobs on your dresser, you may consider mixing in some plain silver or gold knobs that you can buy for ~$2 at Home Depot.
Step 3: Buy materials. You’ll need a small can of paint – I think I got 2 pints and had paint to spare, but ask the clerk if it will cover 2 coats on your dresser. You’ll also need sand paper, a tarp to paint on, a mixing stick, a flat container to pour the paint into, and paint brushes – get a large one and a small one for the edges and buy extra brushes if your friends are going to help.
Step 4: Set up and sand. Lay your tarp, prepare the paint, and start sanding. You don’t have to be too thorough, depending on how thick the finish is, but make sure that the entire surface of the dresser has been sanded. Wipe off the dust and clean the surface when you are finished.
Step 5: Paint. Paint the entire surface of the dresser. Try to paint as evenly as possible, but don’t worry if there are streaks. You’ll cover them with the second layer. Keep in mind that drips of paint will dry up and create a bump so apply a thin layer of paint evenly. Paint the first layer, let it dry for a few hours, and then do the second layer making sure there are no streaks or drip marks. Let the second layer dry over night.
Step 6: Add the knobs. If there aren’t holes where you want your knobs, you can easily drill a small hole where you want them.
Enjoy! Send pictures of your new dresser to designtrov@gmail.com so we can see!


0 Comments